Users & Roles
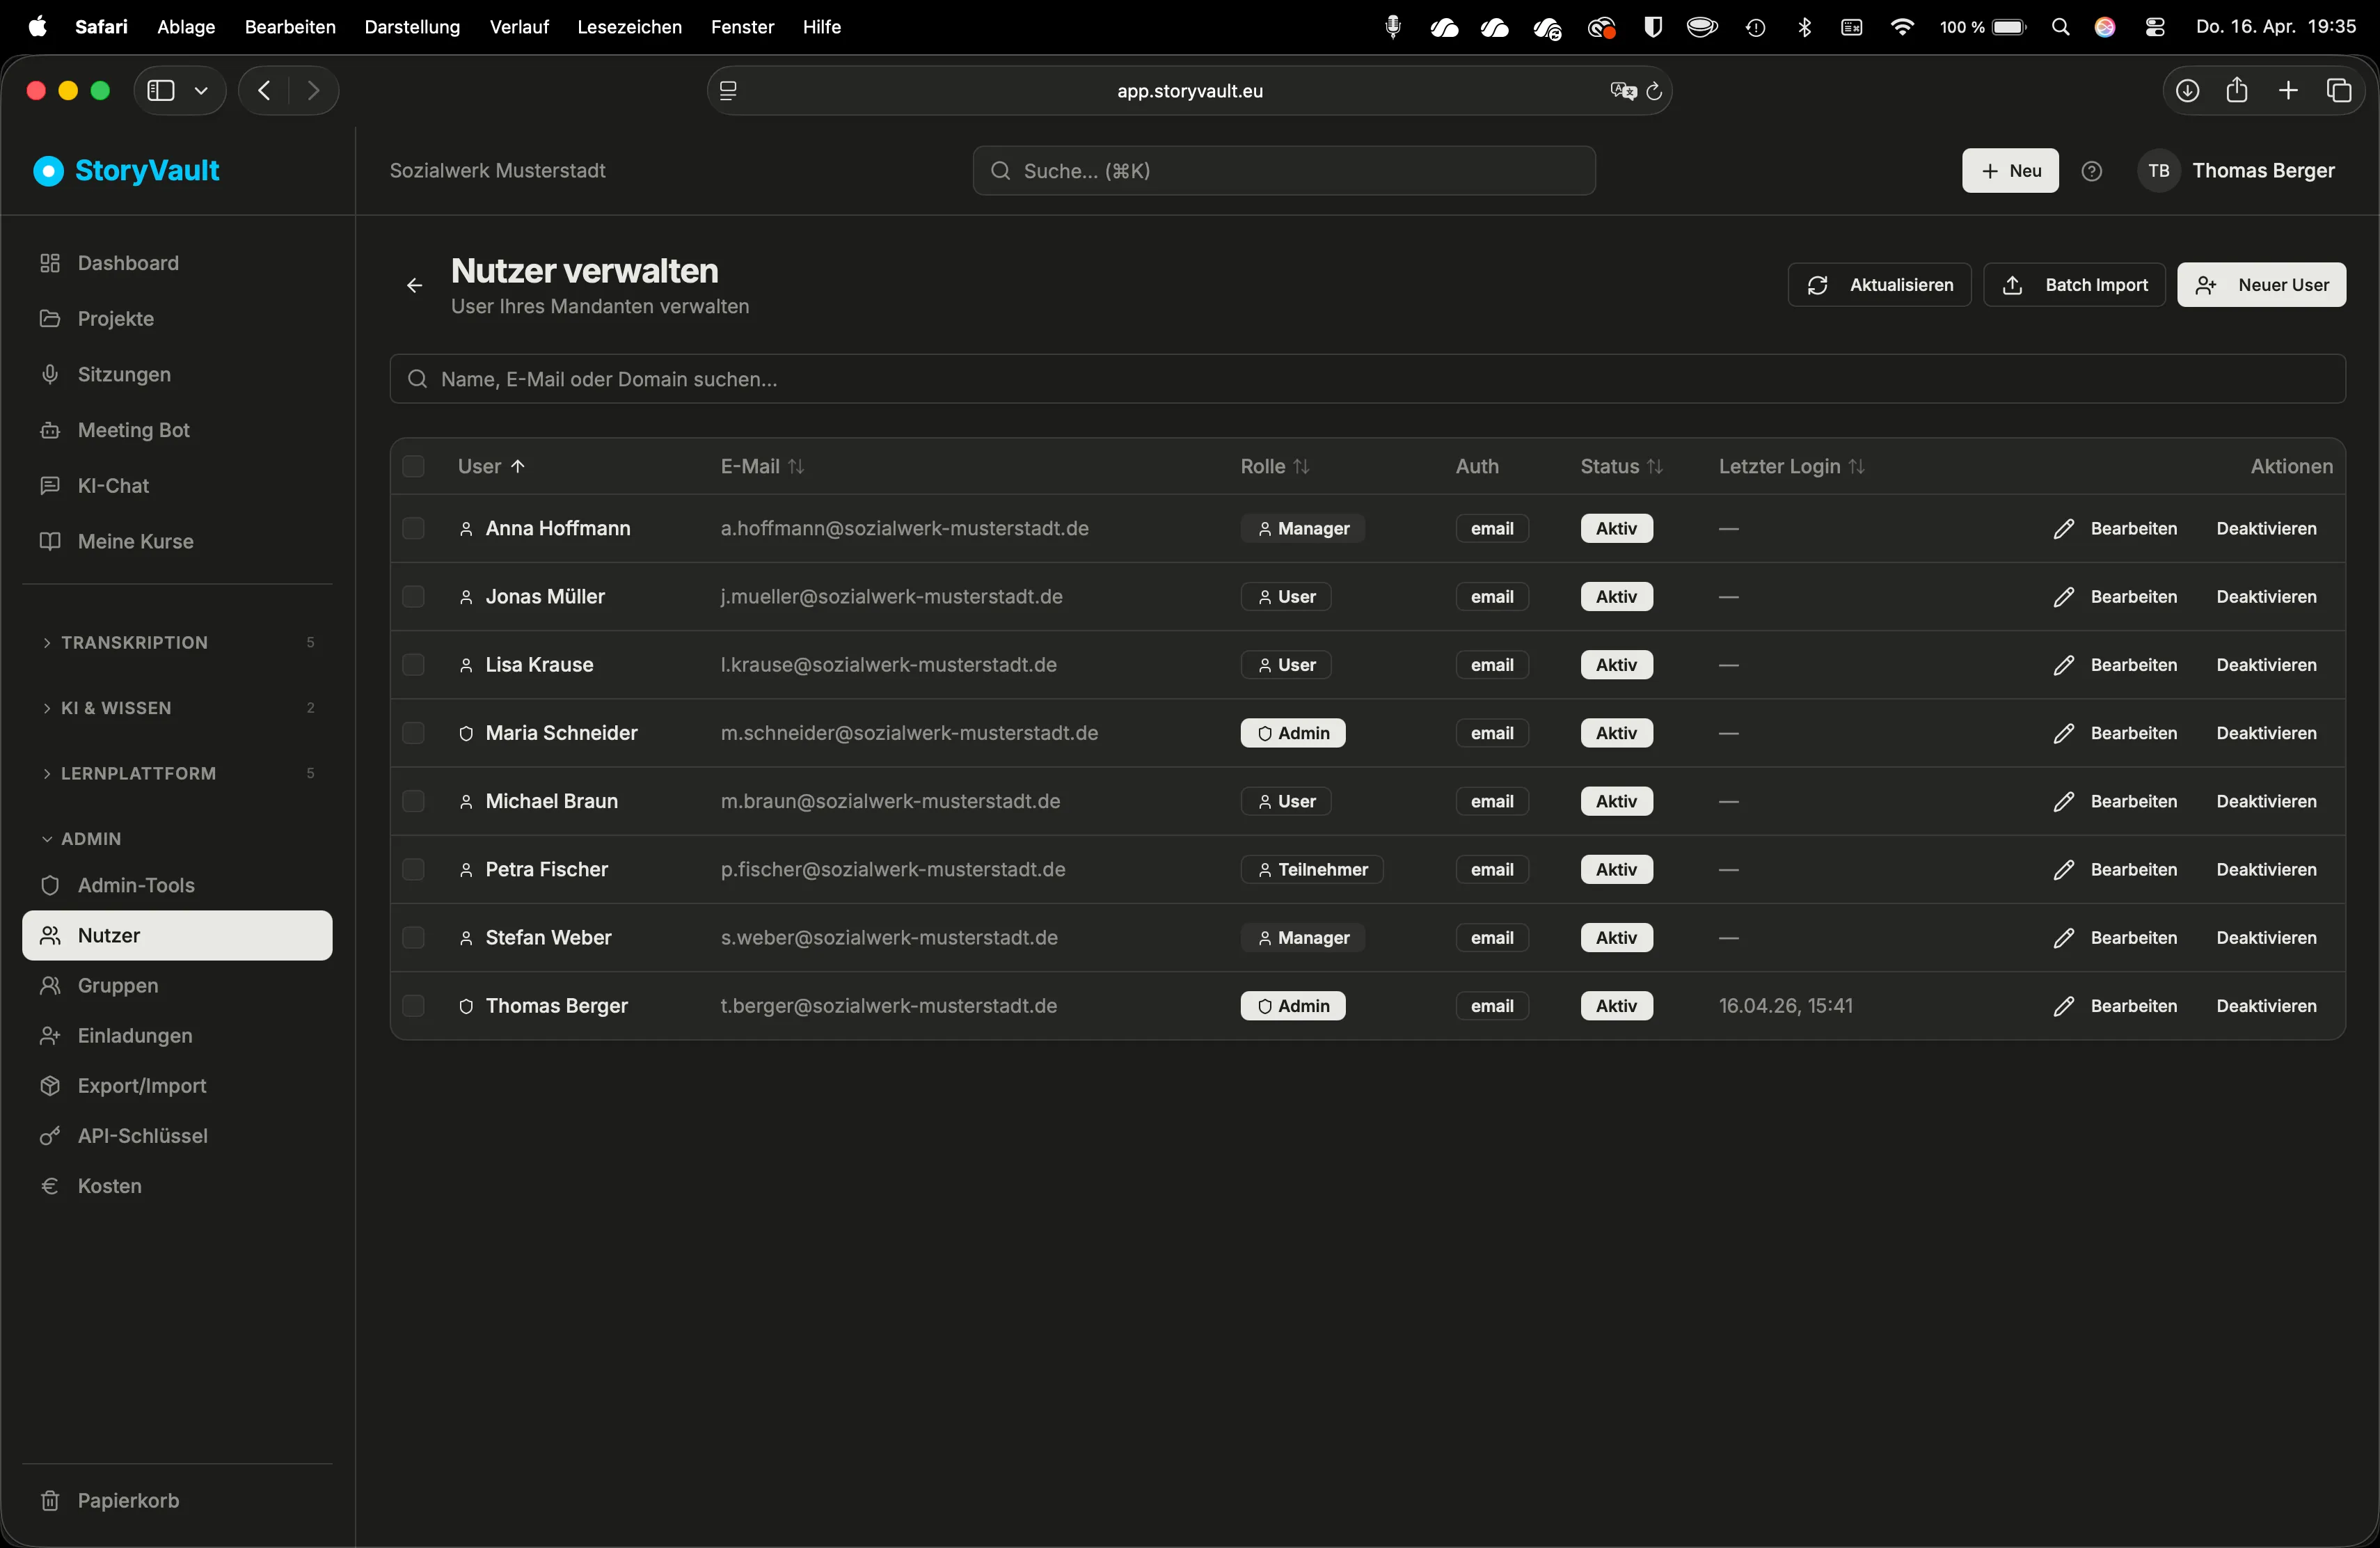
As an administrator, you manage the users in your organization. StoryVault uses a four-tier role system supplemented by additional capabilities.
Role Overview
Section titled “Role Overview”The role determines which tasks a person can perform. Project ownership, direct membership and groups additionally determine access to content. Sessions inherit their project’s visibility. An admin role does not expose other people’s private chats or automatically grant data protection permissions.
| Role | Description | Typical Use |
|---|---|---|
| Participant | View sessions in accessible projects | External consultants, guests, observers |
| User | Create own sessions and projects, upload files, use search | Staff in day-to-day work |
| Manager | Start Meeting Bot, manage projects and sessions | Team leads, QM officers |
| Admin | Full organization management: users, groups, invitations, costs, settings | IT administrators, management |
Capabilities
Section titled “Capabilities”In addition to roles, you can activate individual capabilities per person. These are independent of the role and allow finer-grained control.
| Capability | Description | Requirement |
|---|---|---|
| Learner | Work through courses, complete quizzes, track progress | LMS module and Learner capability, independent of role |
| Trainer | Create courses, edit lessons, configure quiz questions | LMS module and Trainer capability; the Manager role is not required. Admins can also manage LMS courses. |
| Data protection (DPA) | Manage tenant policy, change protection levels, and restore data where permitted | Data protection module enabled for the tenant |
The DPA capability applies to one tenant membership only. A person can be a DPA in tenant A and a regular user in tenant B. See Data protection overview & DPA →.
Creating a User
Section titled “Creating a User”-
Open user management
Sidebar → Admin → Users.
-
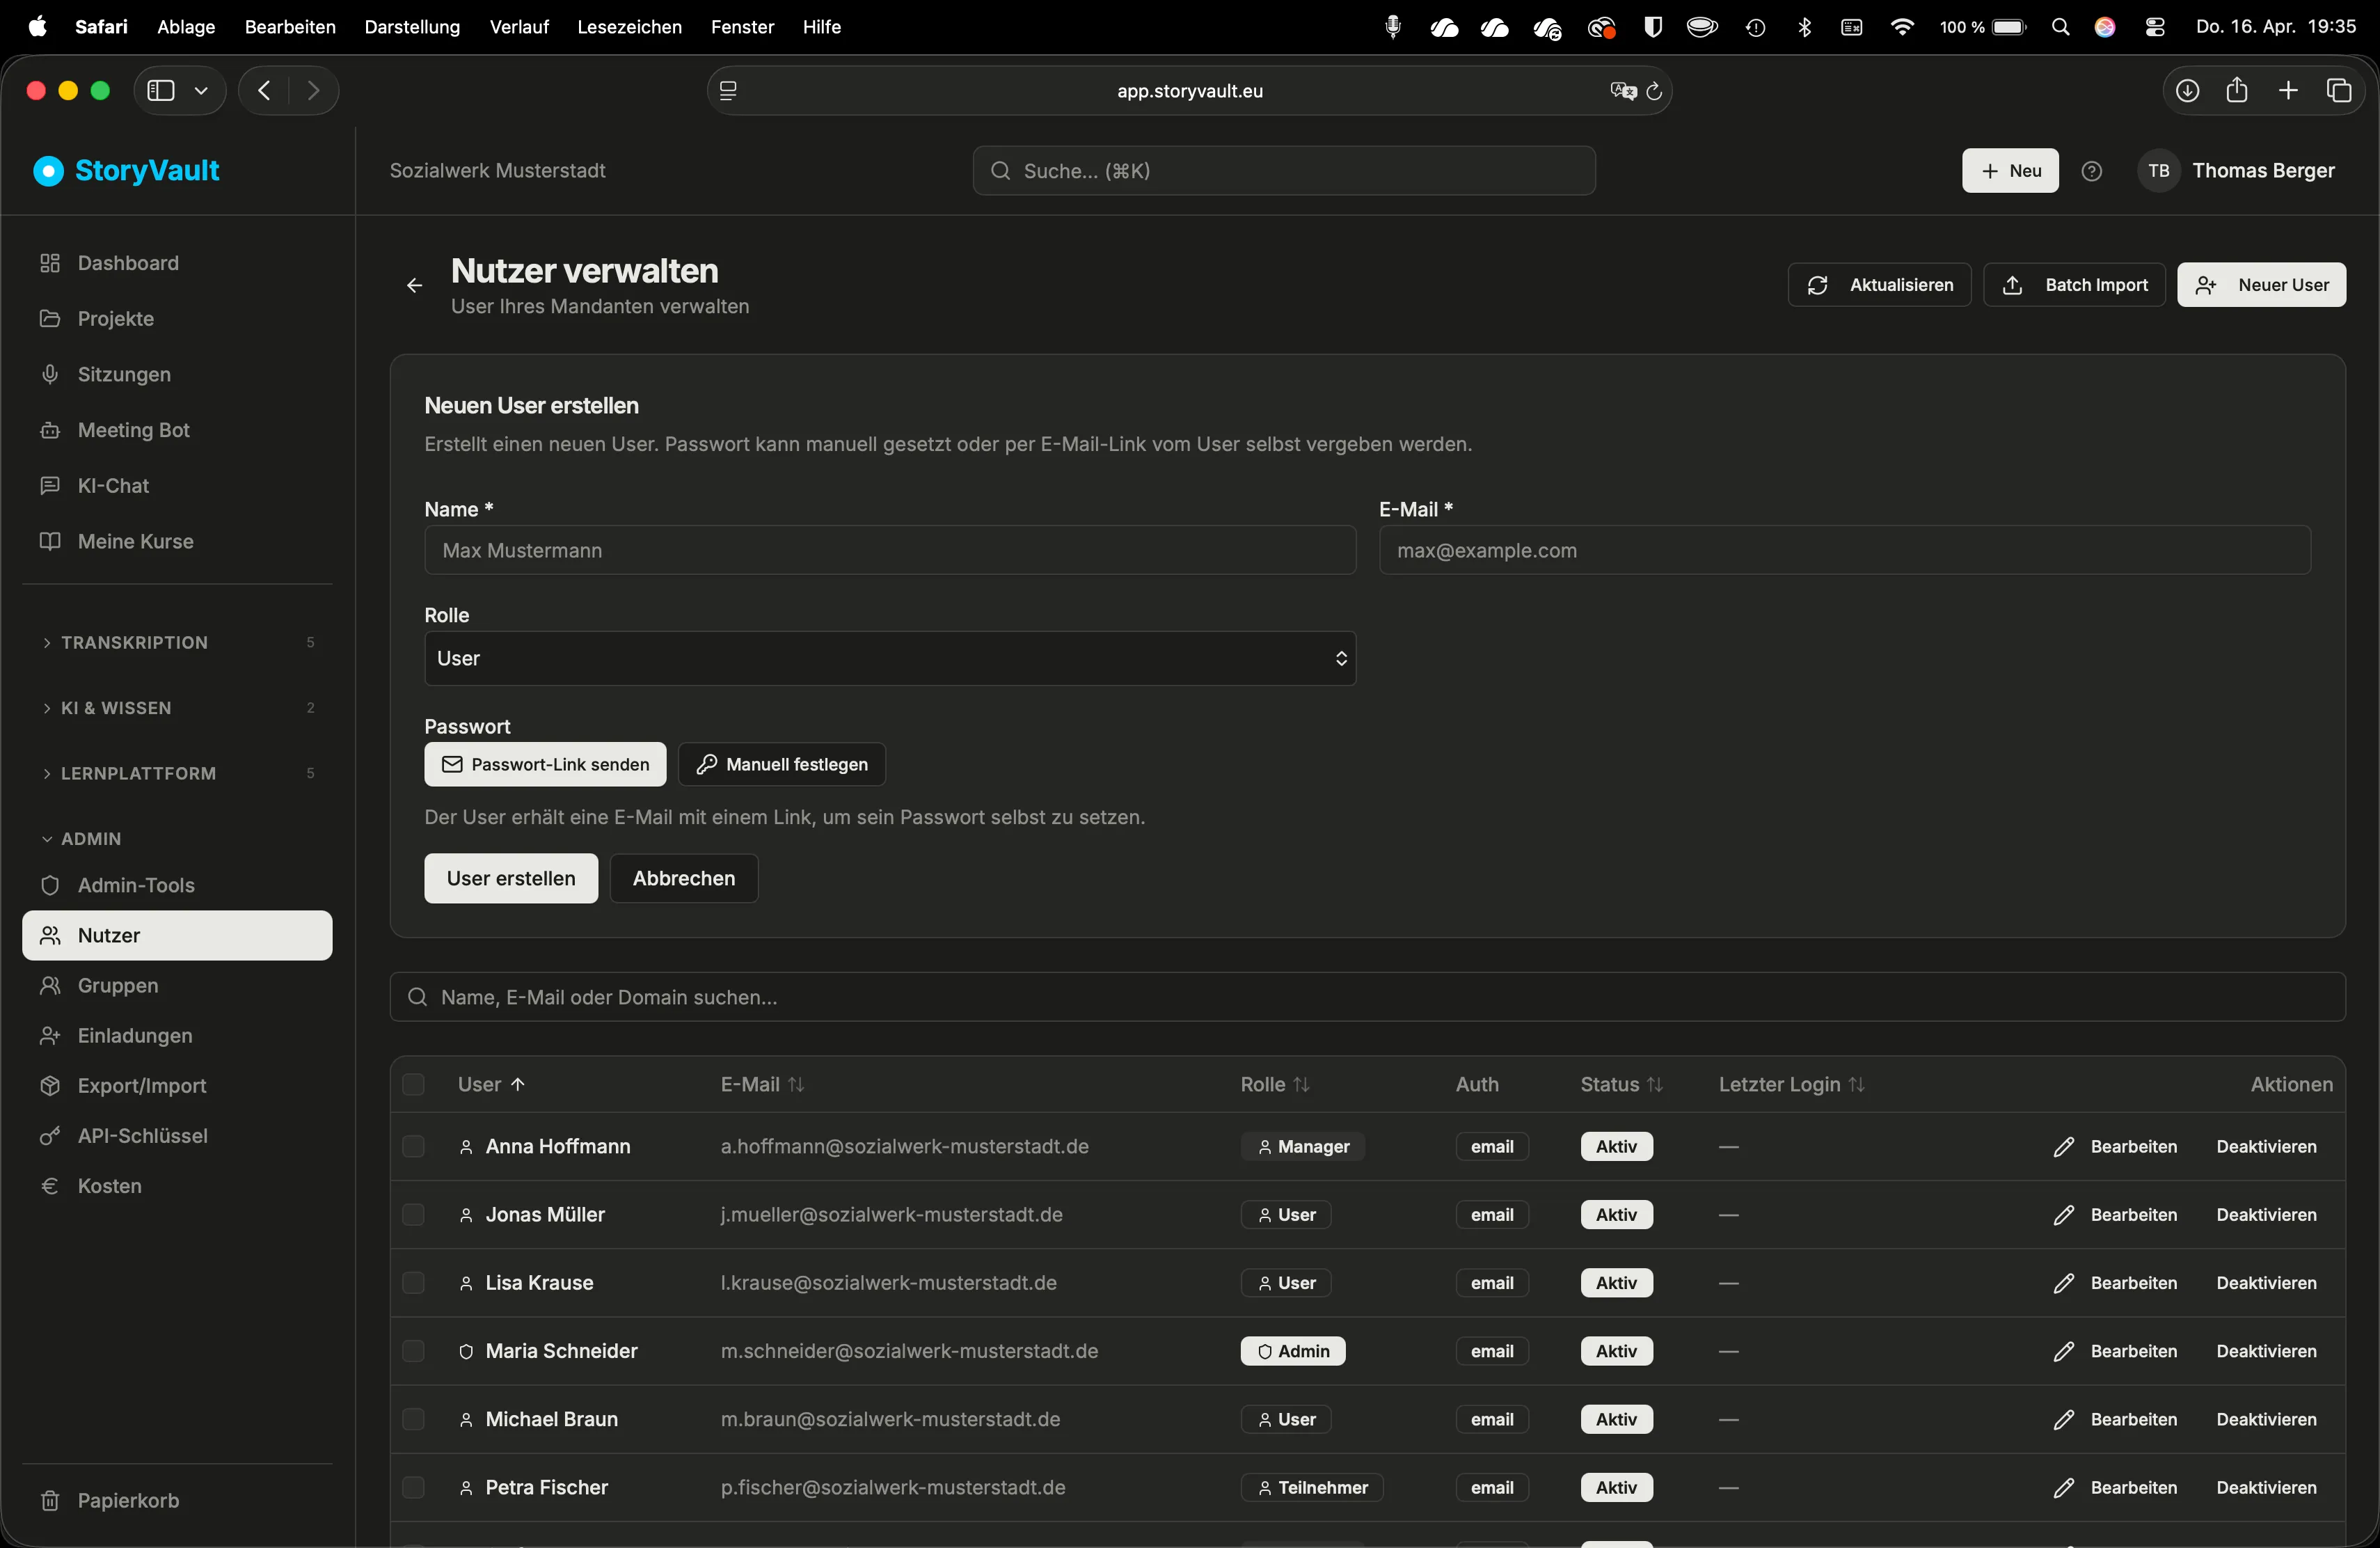
Click “Create User”
Enter first name, last name, and email address. Choose the offered option for a password or account setup by email.
-
Select a role
Choose the appropriate role: Participant, User, Manager, or Admin.
-
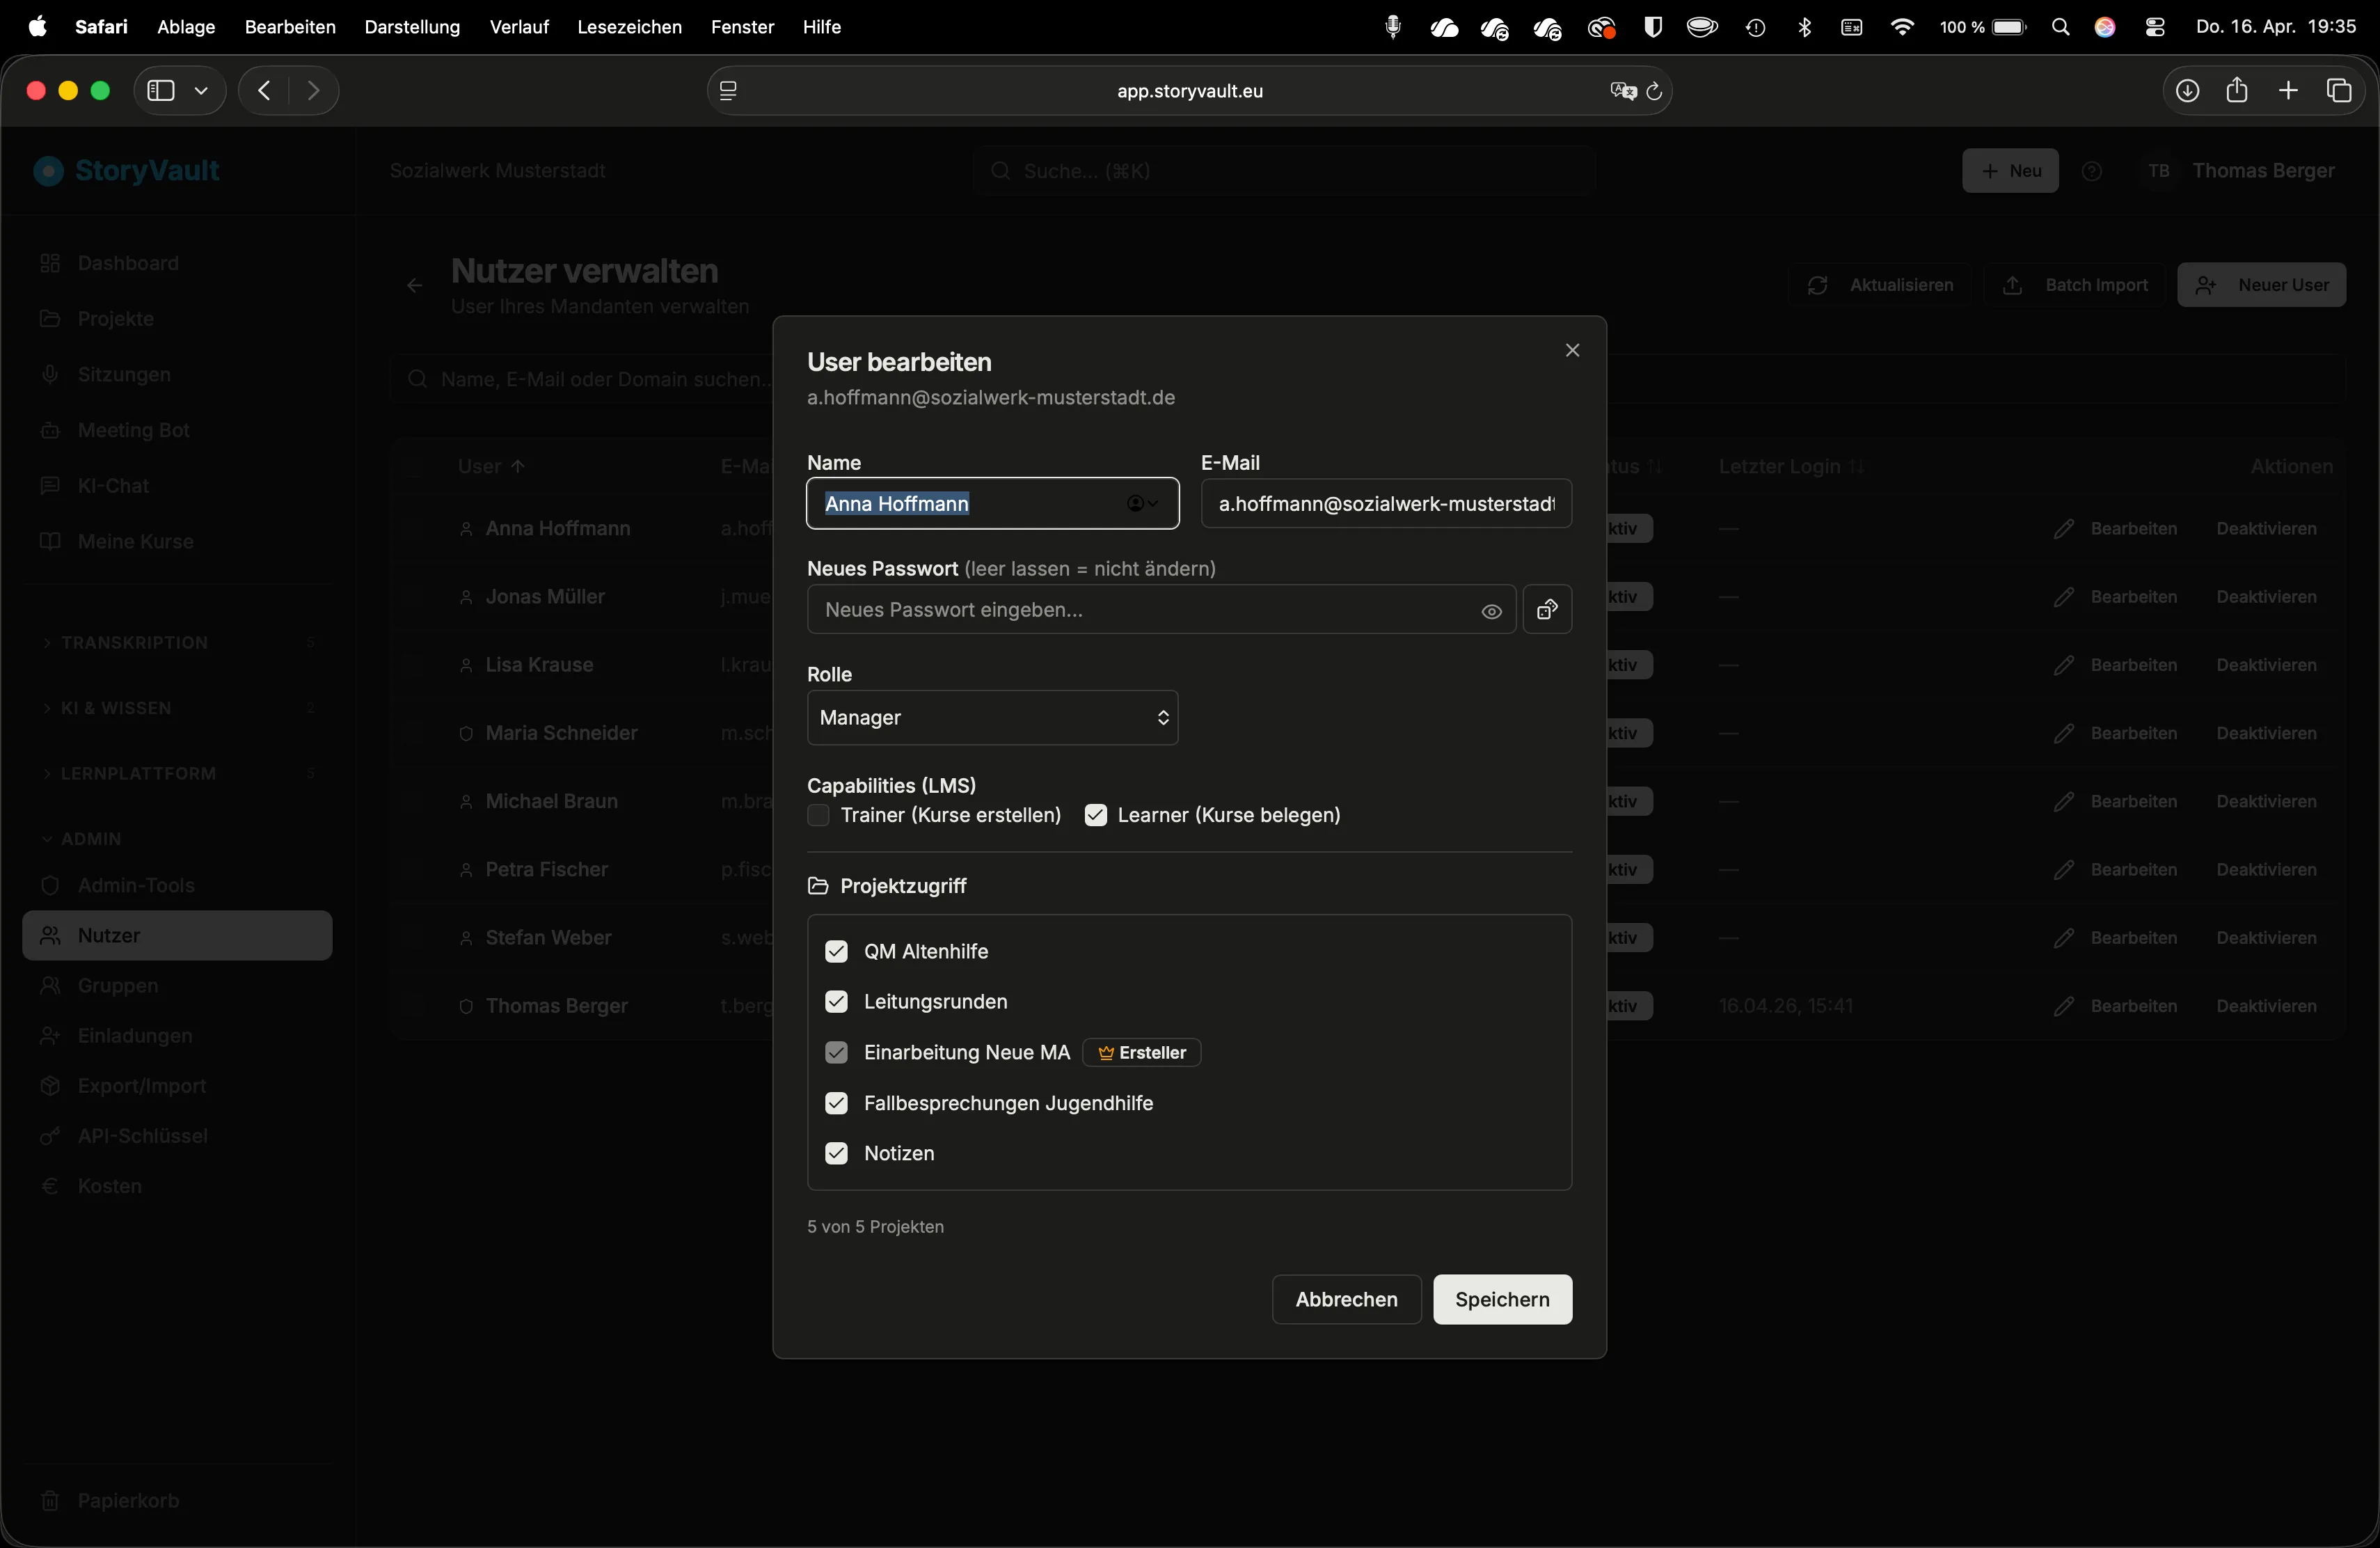
Set capabilities
Enable “Learner”, “Trainer”, and/or “Data protection” as needed. Data protection applies only to the selected tenant.
-
Set project access
Set direct project assignments. Groups can grant additional access. Admins do not need individual grants for ordinary tenant projects; the exception for protected super-admin projects is explained under Projects.
-
Save
The user can log in immediately.
Editing a User
Section titled “Editing a User”Click on a name in the user list to open the profile. Here you can:
- Change the role — for example promote from User to Manager
- Adjust capabilities — enable/disable Learner, Trainer, or Data protection
- Change project access — assign new projects or remove existing ones
- Deactivate the account — the user can no longer log in, but their data is retained
Project Access and Visibility
Section titled “Project Access and Visibility”Visibility of content depends on role and project membership:
- Admin — generally has access to ordinary tenant projects; protected super-admin projects require explicit sharing.
- Manager / User / Participant — gains access as owner, direct project member or member of a shared group.
- Sessions — are visible within accessible projects, including sessions created by others. Viewing and editing are separate permissions; data protection restrictions can further limit access.
In practice: if disability support and senior care teams use separate projects, a disability support user cannot see senior care content unless they gain access directly, through a group or through an admin role in that tenant.
For a specific project, open Projects → project → Share in the top action area. Admins and managers with project access can add or remove people and groups there. Users and participants can view grants. See Projects for instructions and unexpected-access troubleshooting.
Further Reading
Section titled “Further Reading”This page corresponds to the onboarding video “Module 7, Lesson 7.1 — Creating Users and Assigning Roles”.